Item Structure
This guide will walk you through the Structure of the Items that can be created.
Make sure you ran the Project Patcher and setup your Unity Project properly
Static Items
Folders
As mentioned in the previous chapter, an Item can have up to 5 folders.
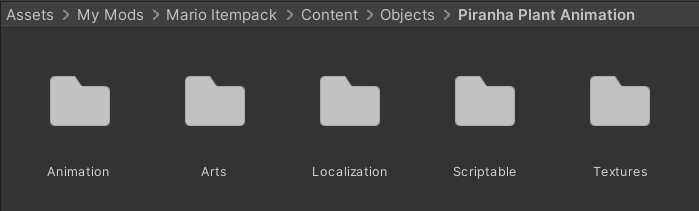
For a Static Item (No Animation) we require the Arts, Localization and Scriptable Folder.
If you have trouble understanding what you need for specific Items, always look on the Example. Learning by doing.
Arts
For the Art, we have 3 Folders:
- ItemChangeSkin
- NewItems
- NewItemsIcon
ItemChangeSkin
The ItemChangeSkin Object is only necessary, if you would like to have different styles for an Object, that can be selected as seen in the Image below:
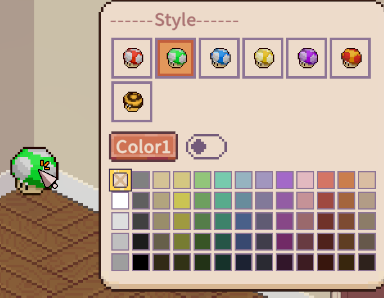
The Objects inside the ItemChangeSkin always follow the Name: "Item_[ID]_X" and X is the Number of skins, starting with 0. If you have a total of 5 skins (including base skin), the last Object should have the name: "Item_[ID]_X"
Those Images are shown inside the Redesign Tab for selecting a different Style for the item.
NewItems
The NewItems Object is always Necessary. It contains:
- The base Item with Name Item_[ID]
- The Shadow of the Item with Name Item_[ID]_s
- The Mask (Optional) for the Item with Name Item_[ID]_mb[Nr]
- The Skin Item with Name Item_[ID]_skin[Nr]
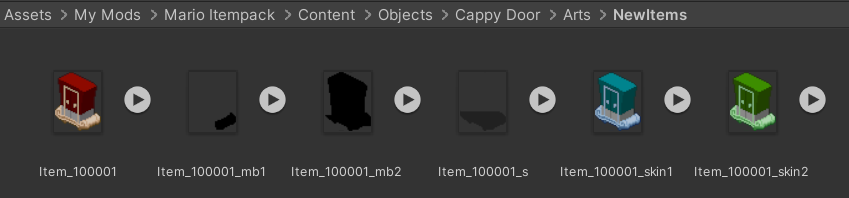
If you don't need the ItemChangeSkin, because you don't want different Styles, you can ignore the Skin Items. They are only required for extra Styles.
Same for Mask. If your Object doesn't need a Mask, because nothing can be placed on it, than you don't require an _mb file.
NewItemsIcon
Contains a single image that follows the same size like in ItemChangeSkin. Those Images are shown inside the bag for selecting the item.
The Name is just the "[ID]" of the Object.
Localization
A json that has the Translation for the Object. It's always called Itemloc_[ID] and should contain the same ID inside the JSON.
Is required for every Object!
Make sure to always write something down for every Language. You don't need to make it in the specific language, it's enough to copy paste the English translation in every field.
Make sure to always hit "Save JSON", otherwise the Changes won't be saved, since those Objects are Text files.
Scriptable
The Scriptable Folder for Static Items has 2 Folders.
- Features
- NewItems
Features
Inside Features you can find a ChangeColor Folder and a MaskThing Folder.
If your Object should have different skins that can be selected, aka you use the ItemChangeSkin folder, than you need to adjust the file inside ChangeColor. Otherwise you can remove the folder completly from your object.
For each Skin you have to make an entry in the List. So if you have 5 Skins, you need 5 Entries. Always keep Color 1 Strength to 1 and the rest to 0.
The MaskThing Object doesn't have to be touched, since the Item Setup Generator Tool is doing the Math for it already and fills out necessary fields.
If you don't have a Mask, because you don't place Objects on that Custom Item, remove the folder completly.
NewItems
NewItems contains the settings of the Item. The Fields itself should be explained already through the Infoboxes.
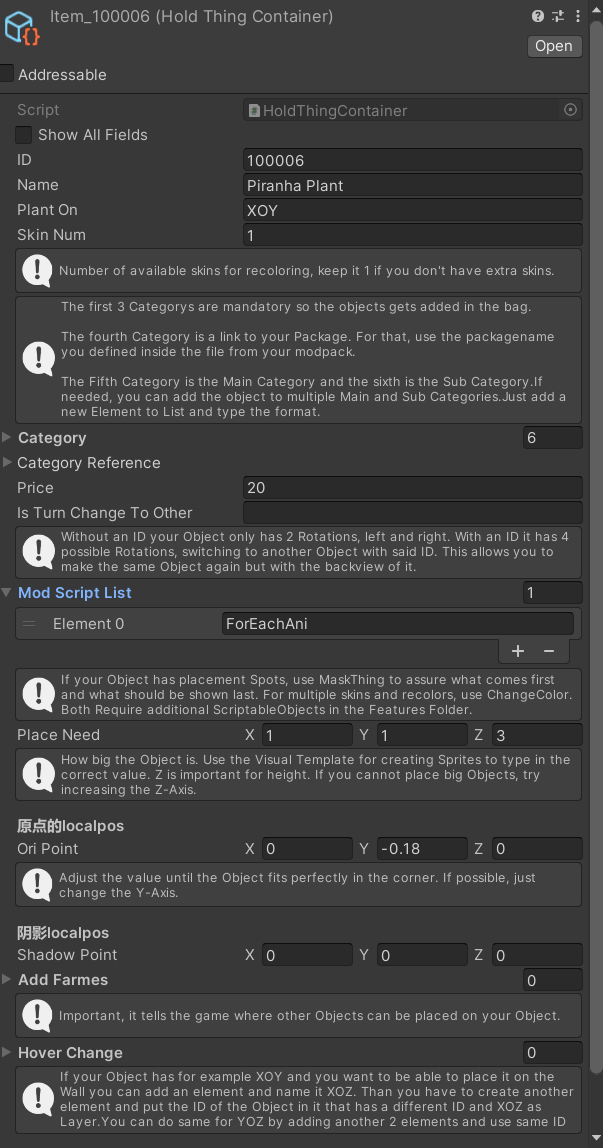
The Main things you have to focus on are:
- ID
- Plant On, defines whether the Object can be placed on the Floor or on the Wall. For teh Floor use XOY, for the Wall use either XOZ or YOZ.
- Skin Num, if you use ItemChangeSkin and have 5 skins (Including base skin), then write down 5 here.
- Category, used to display your Item inside the Bag depending on what current Filter is active.
- Mod Script List -> always uses the Folders inside Features. IF you have different skins, write down ChangeColor. For Masks write down MaskThing.
- Place Need, defines how much space the Object needs. If you use the Item Template you can simply write down the Number you used.
Red fields are X-Axis, Yellow is Y-Axis and the Height is the Z-Axis.
- Ori Point, defines where the Object is placed. Always make sure that the Object fits in the Top Corner.
If you type down item_[ID] in the search field and click on the NewItem Scriptableobject, make sure its addressed. You see that in the Top of the Inspector, if addressables is checked. That is the Item that is imported in the game. You can adjust the Ori Point on that object. If you now create a new Object in Playmode by selecting it in the bag, it will use the new Ori Point.
That way you can simply adjust the Position until its perfectly in the top corner.
DO NOT CHANGE THE Z Axis!
- Add Farmes, if you want to place Objects on your Item, you can add a field that is displayed by the Debugger in yellow. If a field is 2x2 big, you can place Objects that are 2x2 big.
If you use Farmes, you may need to consider adding a Mask, depending on how the Object looks like. If you have a pipe for example and want to put Objects inside it, like the Mario Modpack provides, you need a mask so that Object are not clipping
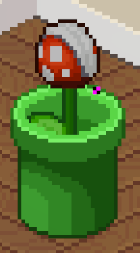
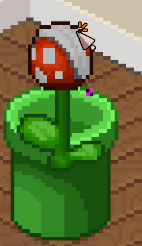
The Category is important as said. The first 3 entries should not be touched! The rest can be set depending on what you need. For the Fourth Entry, you need to enter your packagename, which was located at:
Assets -> My Mods -> Modpack -> Content -> packagename.json
Use the EXACT same name you put into there.
For the fifth and sixth Category, you can open the Category Reference and decide, what fits your Object best.
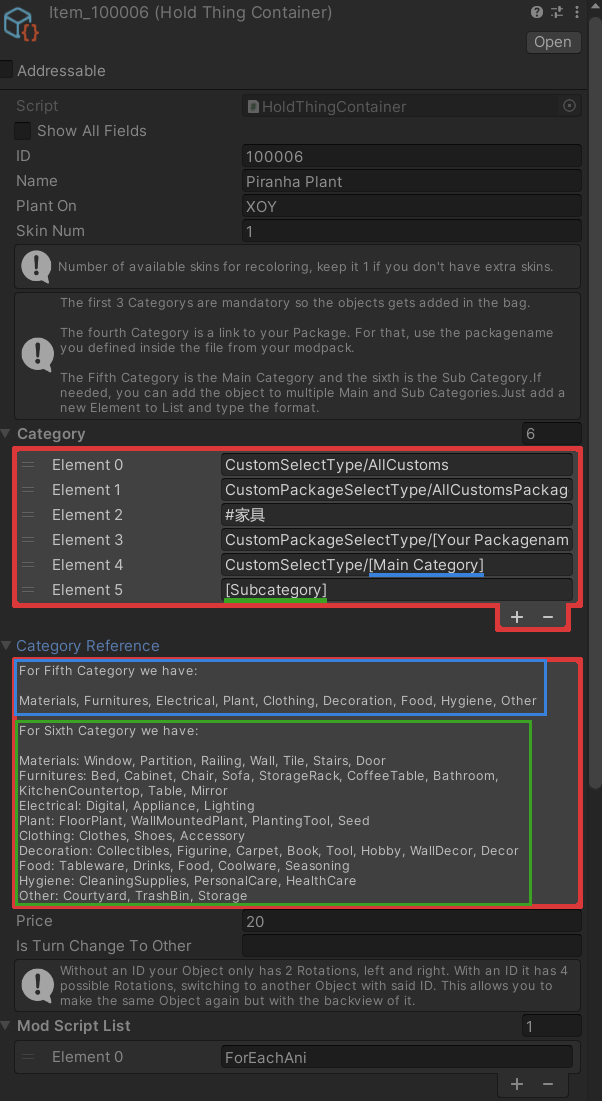
Animated Items
No Skins for Animated Items
First thing first, you cannot do skins with Animated Items (Atm, not sure if base game features skins). The Folder ItemChangeSkin inside Arts and the ChangeColor Folder inside Features can both be deleted for that kind of object and removed from the Mod Script List inside the Scriptable -> NewItems -> Item_[ID] object.
There are 4 different Examples of Animatable Objects. All different Types require all folders.
The Texture folder has a Sprite and Texture2Ds Folder. The Texture2Ds Folder contains the Animation, each Frame being it own PNG. The Name is always "Item_[ID]_X" with X starting with 1.

To get the Sprite of an Texture, make sure you have set the Texture Type of it to Sprite, compression to High Quality and Filter Mode to Point (no filter). After that you can click on the arrow and click on the Sprite. Press CTRL + C to copy and move to the Sprites folder and press CTRL + V to p aste

New Folders in Scriptable
Every Animation has a AniEvent folder that contains an AniEvent Object. You do not need to touch it, just make sure the ID is set correctly and that's all.
Depending on what animation example item you copied, you have 2 different Folders in Features. ForEachAni and AnimationPlayer.
It is recommended to also not touch these as long as you unsure of how things work.
Depending on what you change inside the Animation folder in NewItemAnimation and AnimationClips you have to adjust those files, but considering we only replace the Clips with our own generated ones and keeping the Names as they are, nothing has to be adjusted.
Animation Folder
NewItemAnimation contains the Animation itself. Double Clicking it opens the Animator Tab
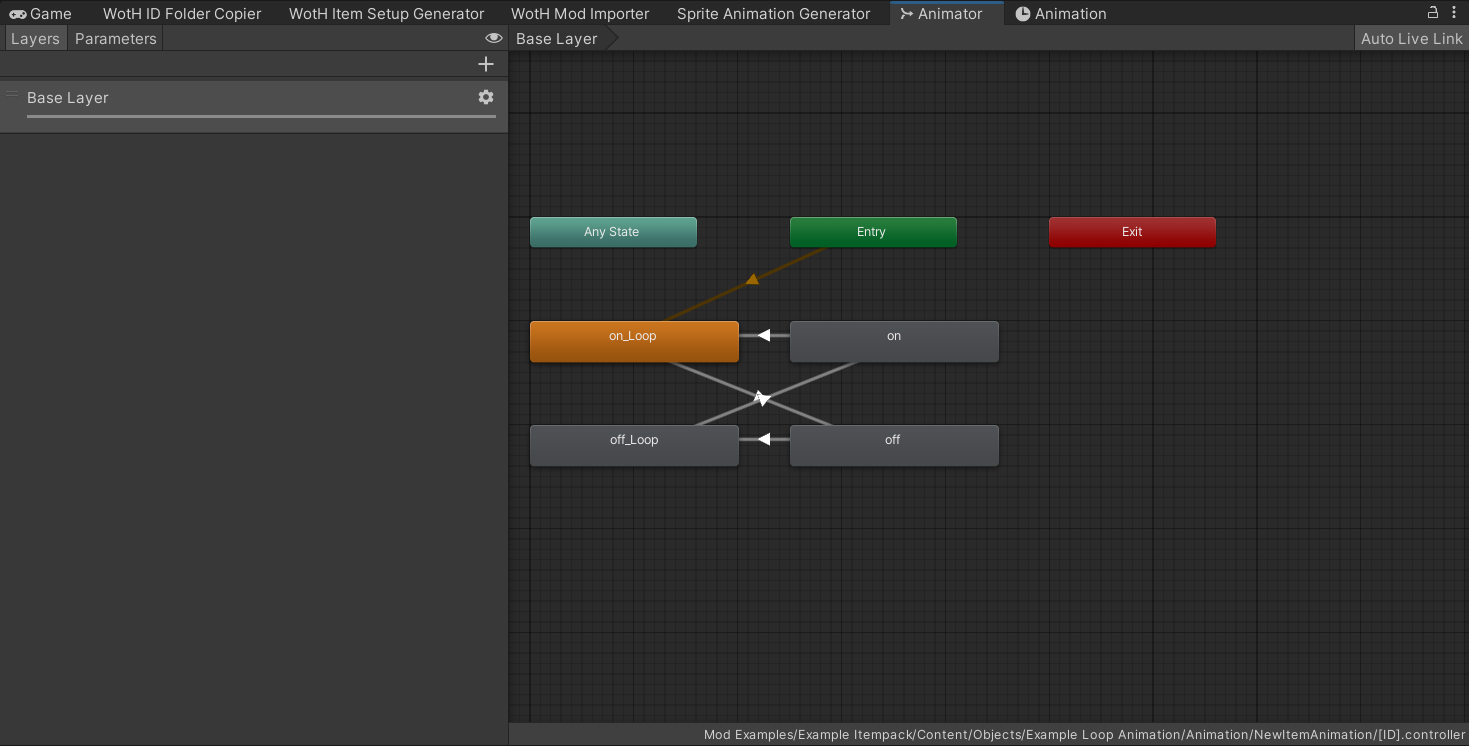
For custom Animation you have to switch out each Object there with its new Animation Clip. Clicking on an object opens up the Infos in the Inspector. There you can switch the Clip in the "Motion" field with the new Clip you created.
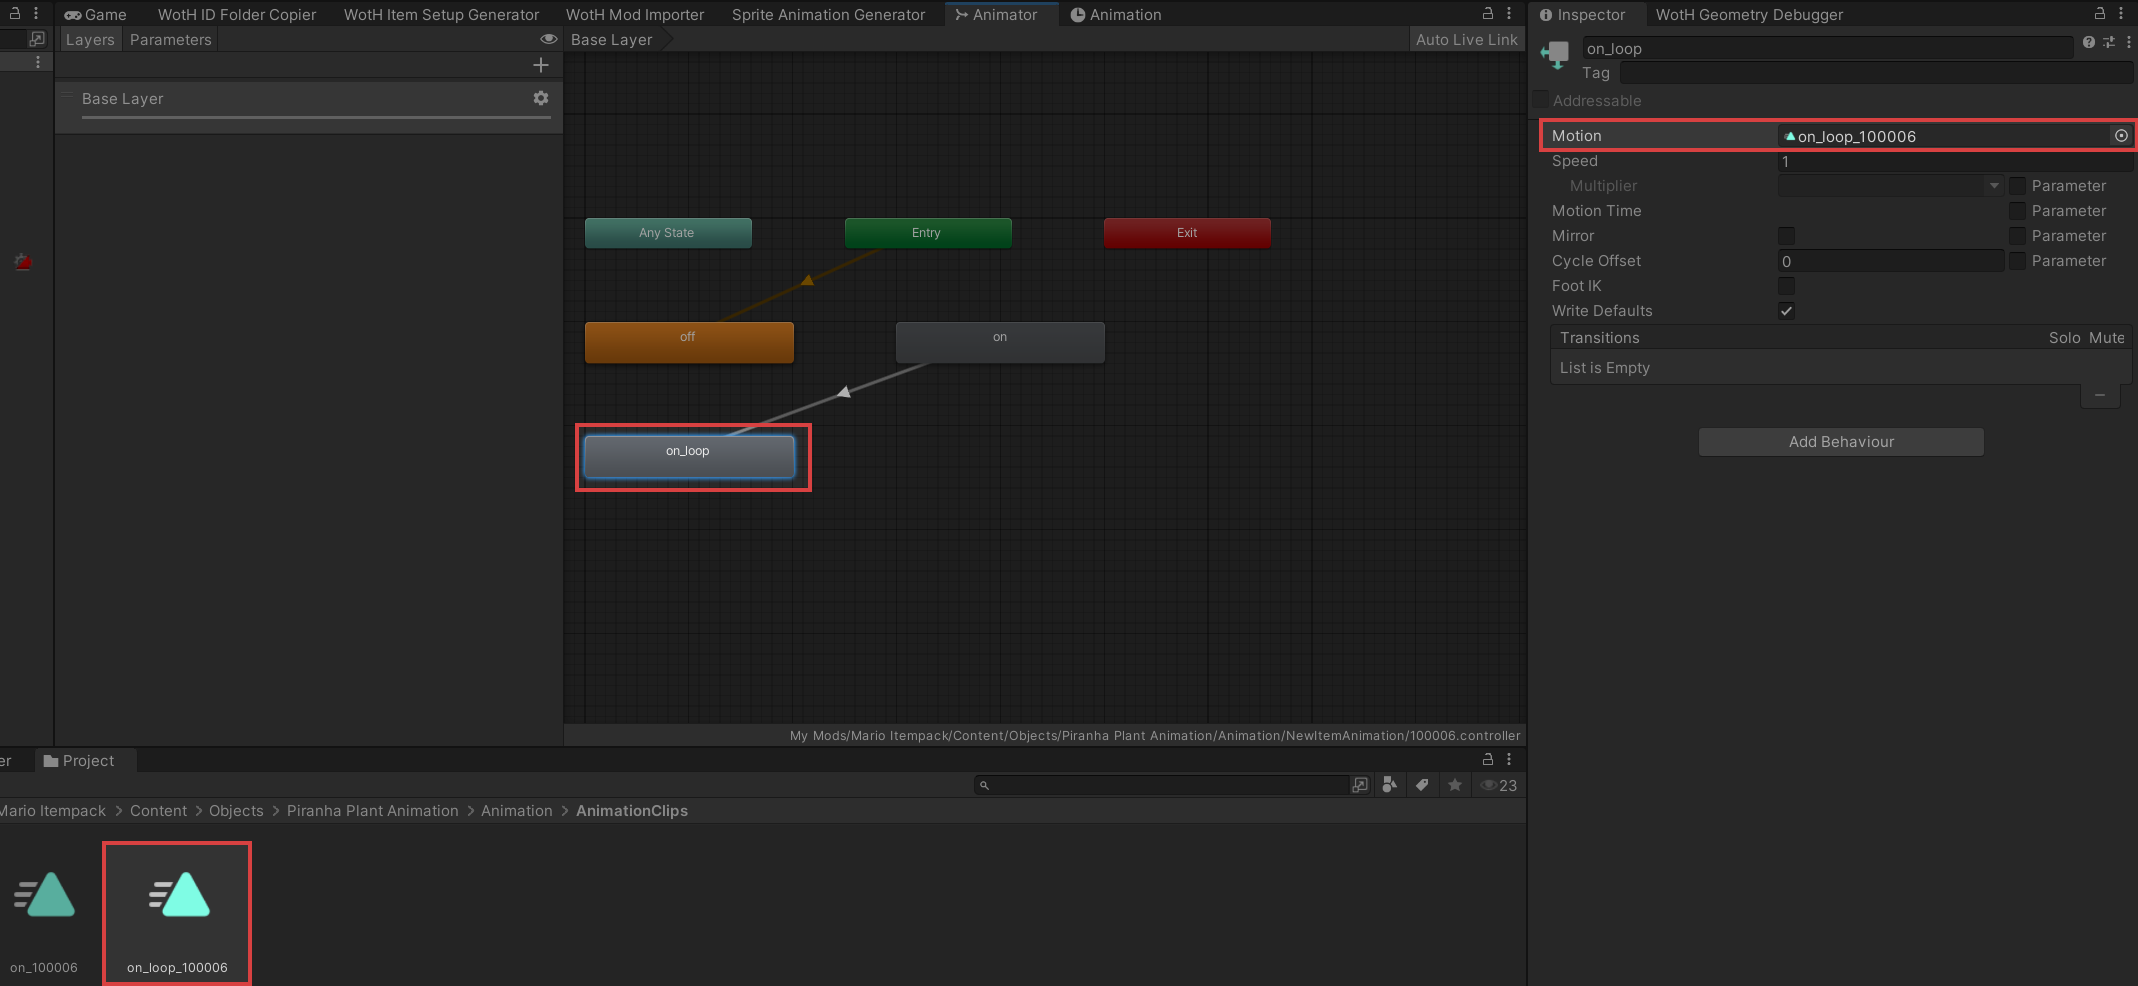
The Clip itself has to be created with the Sprite Animation Generator and placed in the AnimationClips folder. Double Clicking a Clip opens the Animation
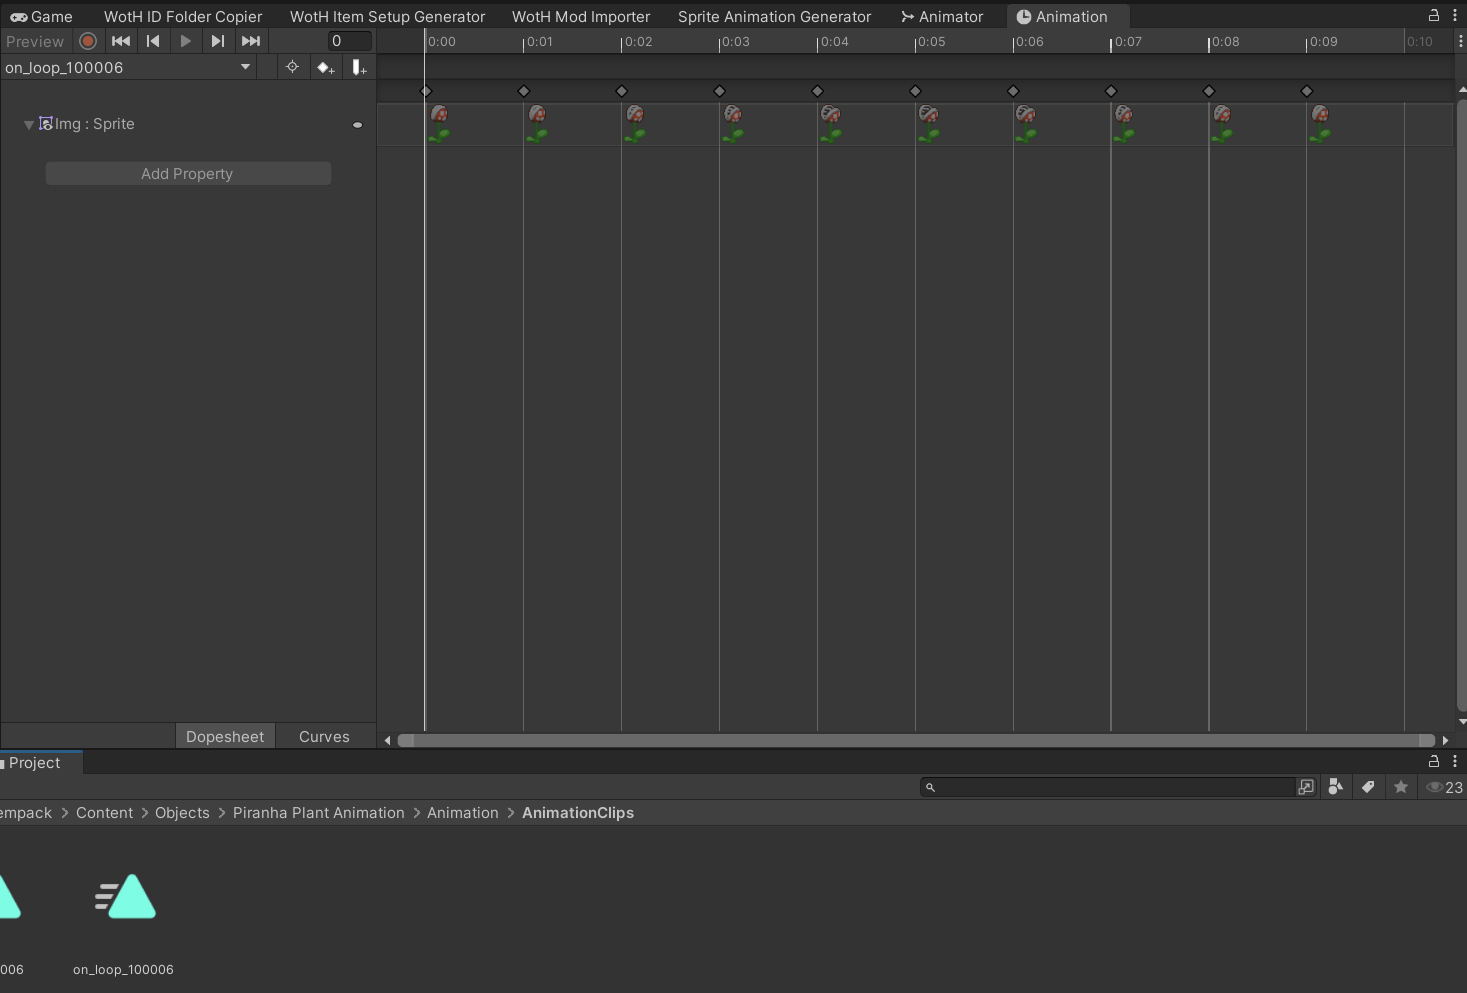
If you don't see anything, go to the arrow next to Img : Sprite on the left. Afterwards you should see things. DO NOT TOUCH ANYTHING IN HERE. You can check if the sprites have been set correctly and that's all.
Always keep the Clips from the dedicated Animation Object that you copied the same, and only adjust the end with your Object [ID].
The Steps for Animations are:
- Place Textures in Texture2Ds Folder.
- Copy Sprite and paste them inside the Sprite Folder.
- Generate a new Clip with the Sprites.
- Replace the Animation by Clicking it on the Animator and drop your new Animation Clip inside the Motion Field of that Animation.