Unity Project Setup
This guide will walk you through setting up a Unity project for the WotH Custom Item SDK.
The WotH Project Patcher generates a Unity project from your local Whisper of the House installation that can be opened and worked with in the Unity Editor.
This tool works with your own local game installation. It does not distribute game files.
Do not redistribute extracted game files or generated game data.
Requirements
Before you start, make sure you have:
- Unity 2021.3.45f2
- 3D (URP) Unity project
- Git
- .NET 9.0
- Up to ~17 GB of free disk space
Git is required for installing packages through the Unity Package Manager using Git URLs.
.NET 9.0 is required to run AssetRipper.
The project may require up to approximately 17 GB of free disk space.
Create a Unity Project
Create a new Unity project with the following requirements:
- Unity Version:
2021.3.45f2 - Template:
3D - Render Pipeline:
URP
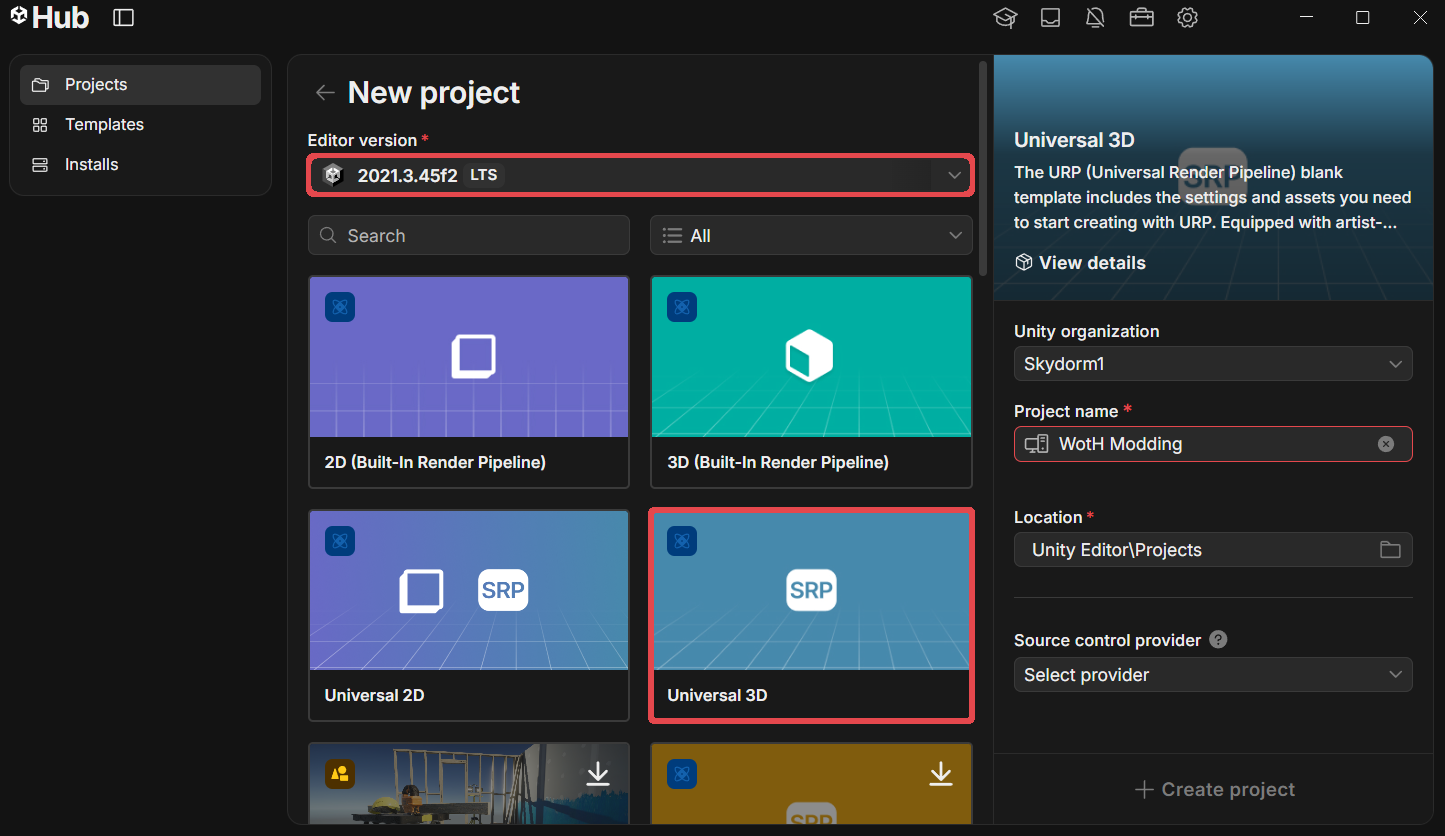
After creating the project, wait until Unity has finished importing all project files before continuing.
Install the Unity Project Patcher
Open the Unity Package Manager: Window > Package Manager Click the + button in the top-left corner.
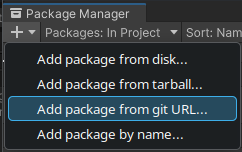
If you had Unity open before installing Git, it will complain about Git not being installed. In this case, close the Unity Editor and Unity Hub, and make sure they are actually fully closed. If nothing is working, try restarting your PC.
Select: Add package from git URL
Enter:
https://github.com/nomnomab/unity-project-patcher.git
Click Add.
The Unity Project Patcher is the core package used by the WotH Project Patcher.
Install the WotH Project Patcher
After installing the Unity Project Patcher, repeat the same process.
Open:
Window > Package Manager
Click the + button and select:
Add package from git URL
Enter:
https://github.com/Skydorm1/unity-woth-project-patcher.git
Click Add.
Install the Unity Project Patcher first, followed by the WotH Project Patcher.
Run the Project Patcher
Once both packages are installed, open:
Tools > Unity Project Patcher > Open Window

Next, look below the Asset Tab and click on the UPPatcherUserSettings that was created.
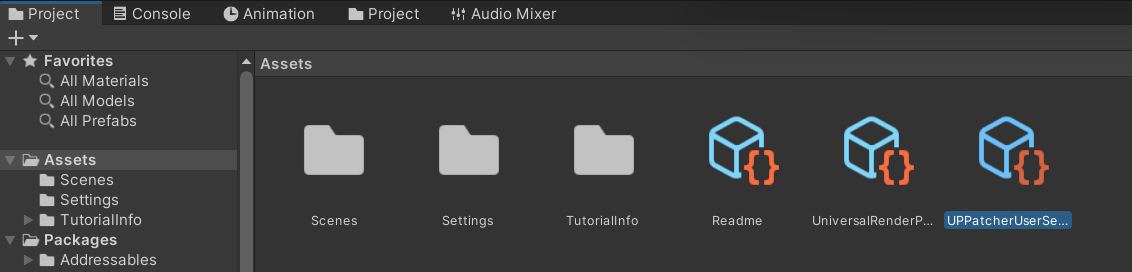
On the Inspector, click on the folder Icon to the right and select the Path to your Whipser of the House installation as described in the Info Box
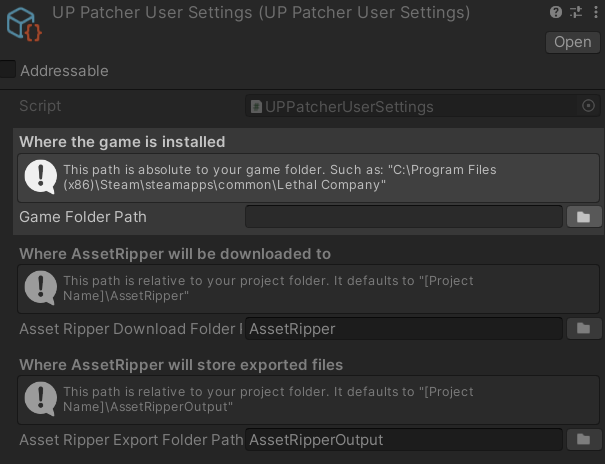
Press Run Patcher inside the Patcher Window now to start the patching process.
Input System
If Unity asks you to restart the editor because of the Input System, select: Yes
Safe Mode
During the patching process, Unity may ask whether you want to enter Safe Mode.
Select: Ignore
This will happen twice during the process. Make sure to select Ignore both times. Otherwise, the patching process will not continue until the project is opened normally.
Patching Time
A fresh patch currently takes approximately:
~1:20h
The actual duration can vary significantly depending on your system speed and project size.
The project uses a custom AssetRipper build based on the newer AssetRipper 2.0.
Run Repair Tool
After successfully setting up the Project, you need to go to Tools and open WotH Debugger and select the Repair Tool.

Adding Unlocker
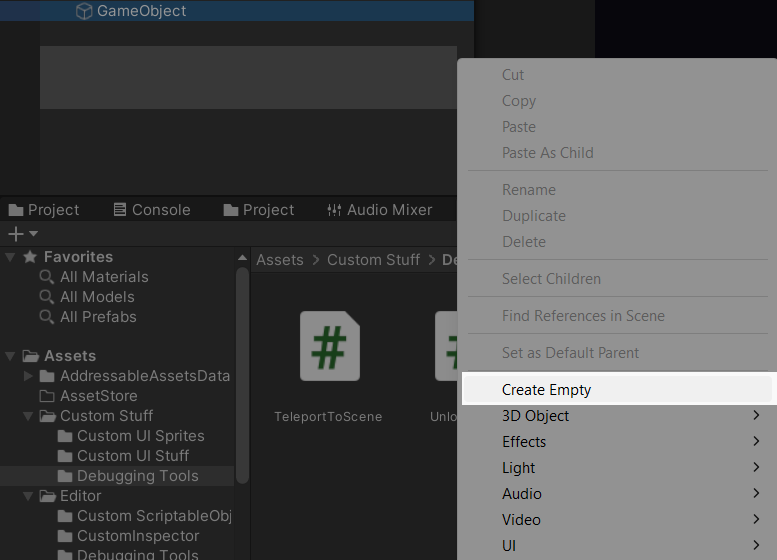
Go to the Hierarchy and right click on an empty space, than select "Create Empty".
Inside Project Tab, go to Assets -> Custom Stuff -> Debugging Tools .
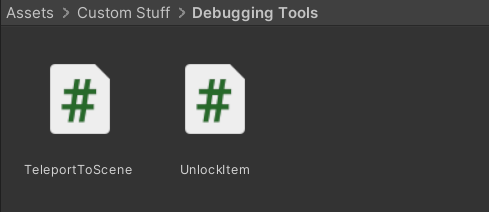
Now select the newly created Object in the Hierarchy and drag and drop the UnlockItem Script into the Inspector on the right side.
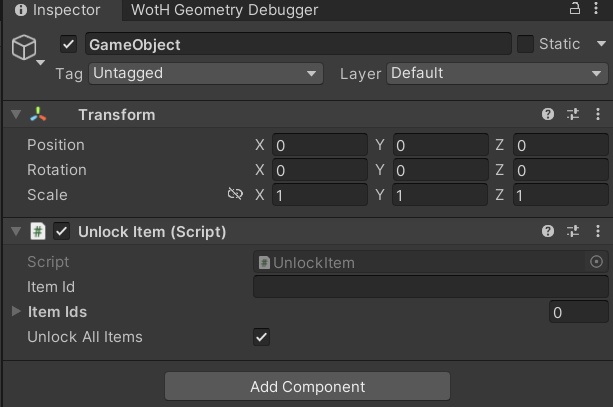
Enter a Number inside the ItemID field, like 1, and keep "Unlock All Items" checked. Feel free to also rename the Object by clicking on "GameObject above and tpye in "Item Unlocker".
This Step might be combined with the Repair Tool in the Future
Loading Layout
Quick Loading
To have the best Workflow for your modding process, you can scroll down on the bottom left side until you see under packages the Whipser of the House folder. Click on it and open the Layout folder.
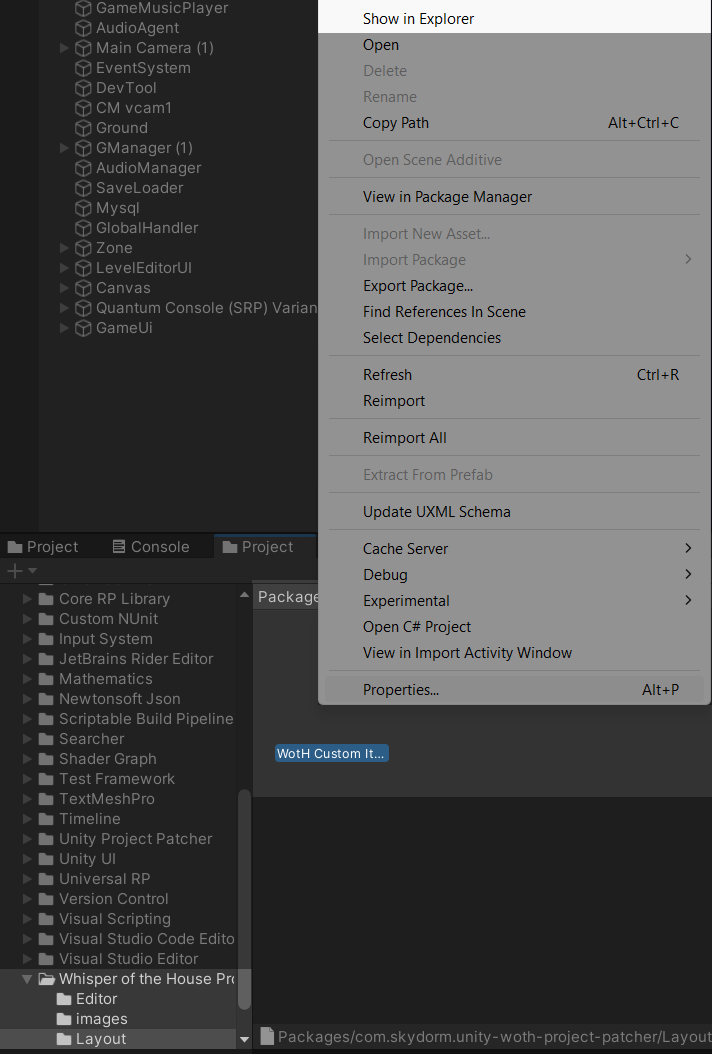
Click on "Show in Explorer" and copy the Path to the folder.
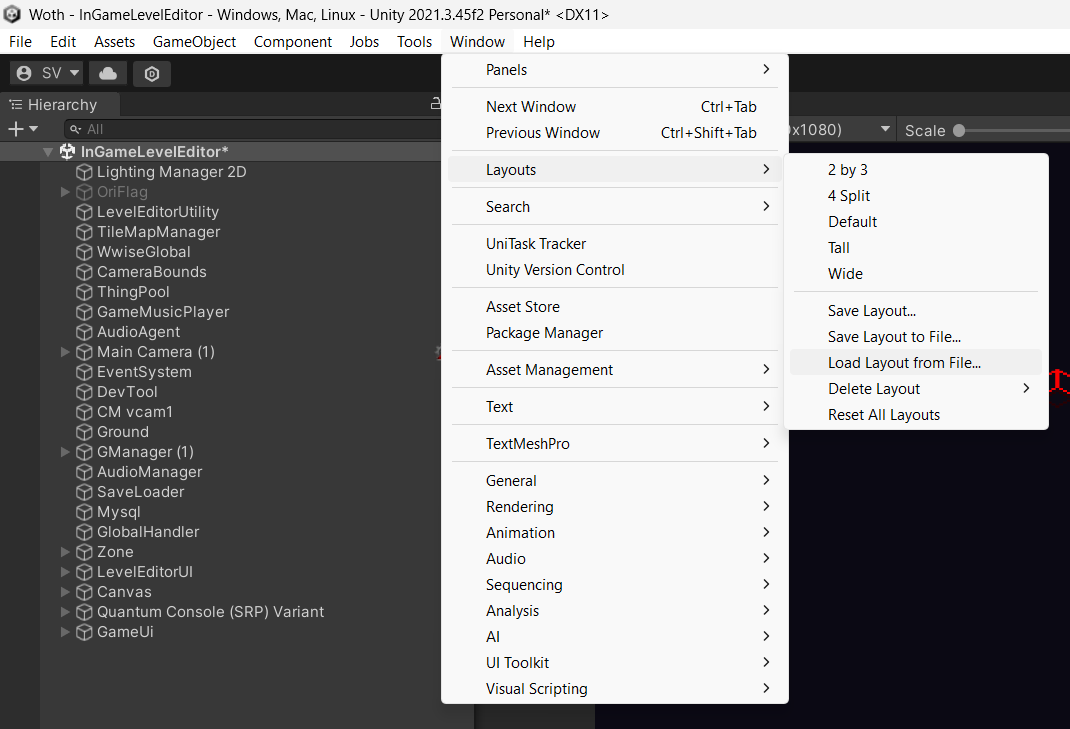
Next, go to Window -> Layouts -> Load Layout from File
Insert the Path you just copied and select the Layout.
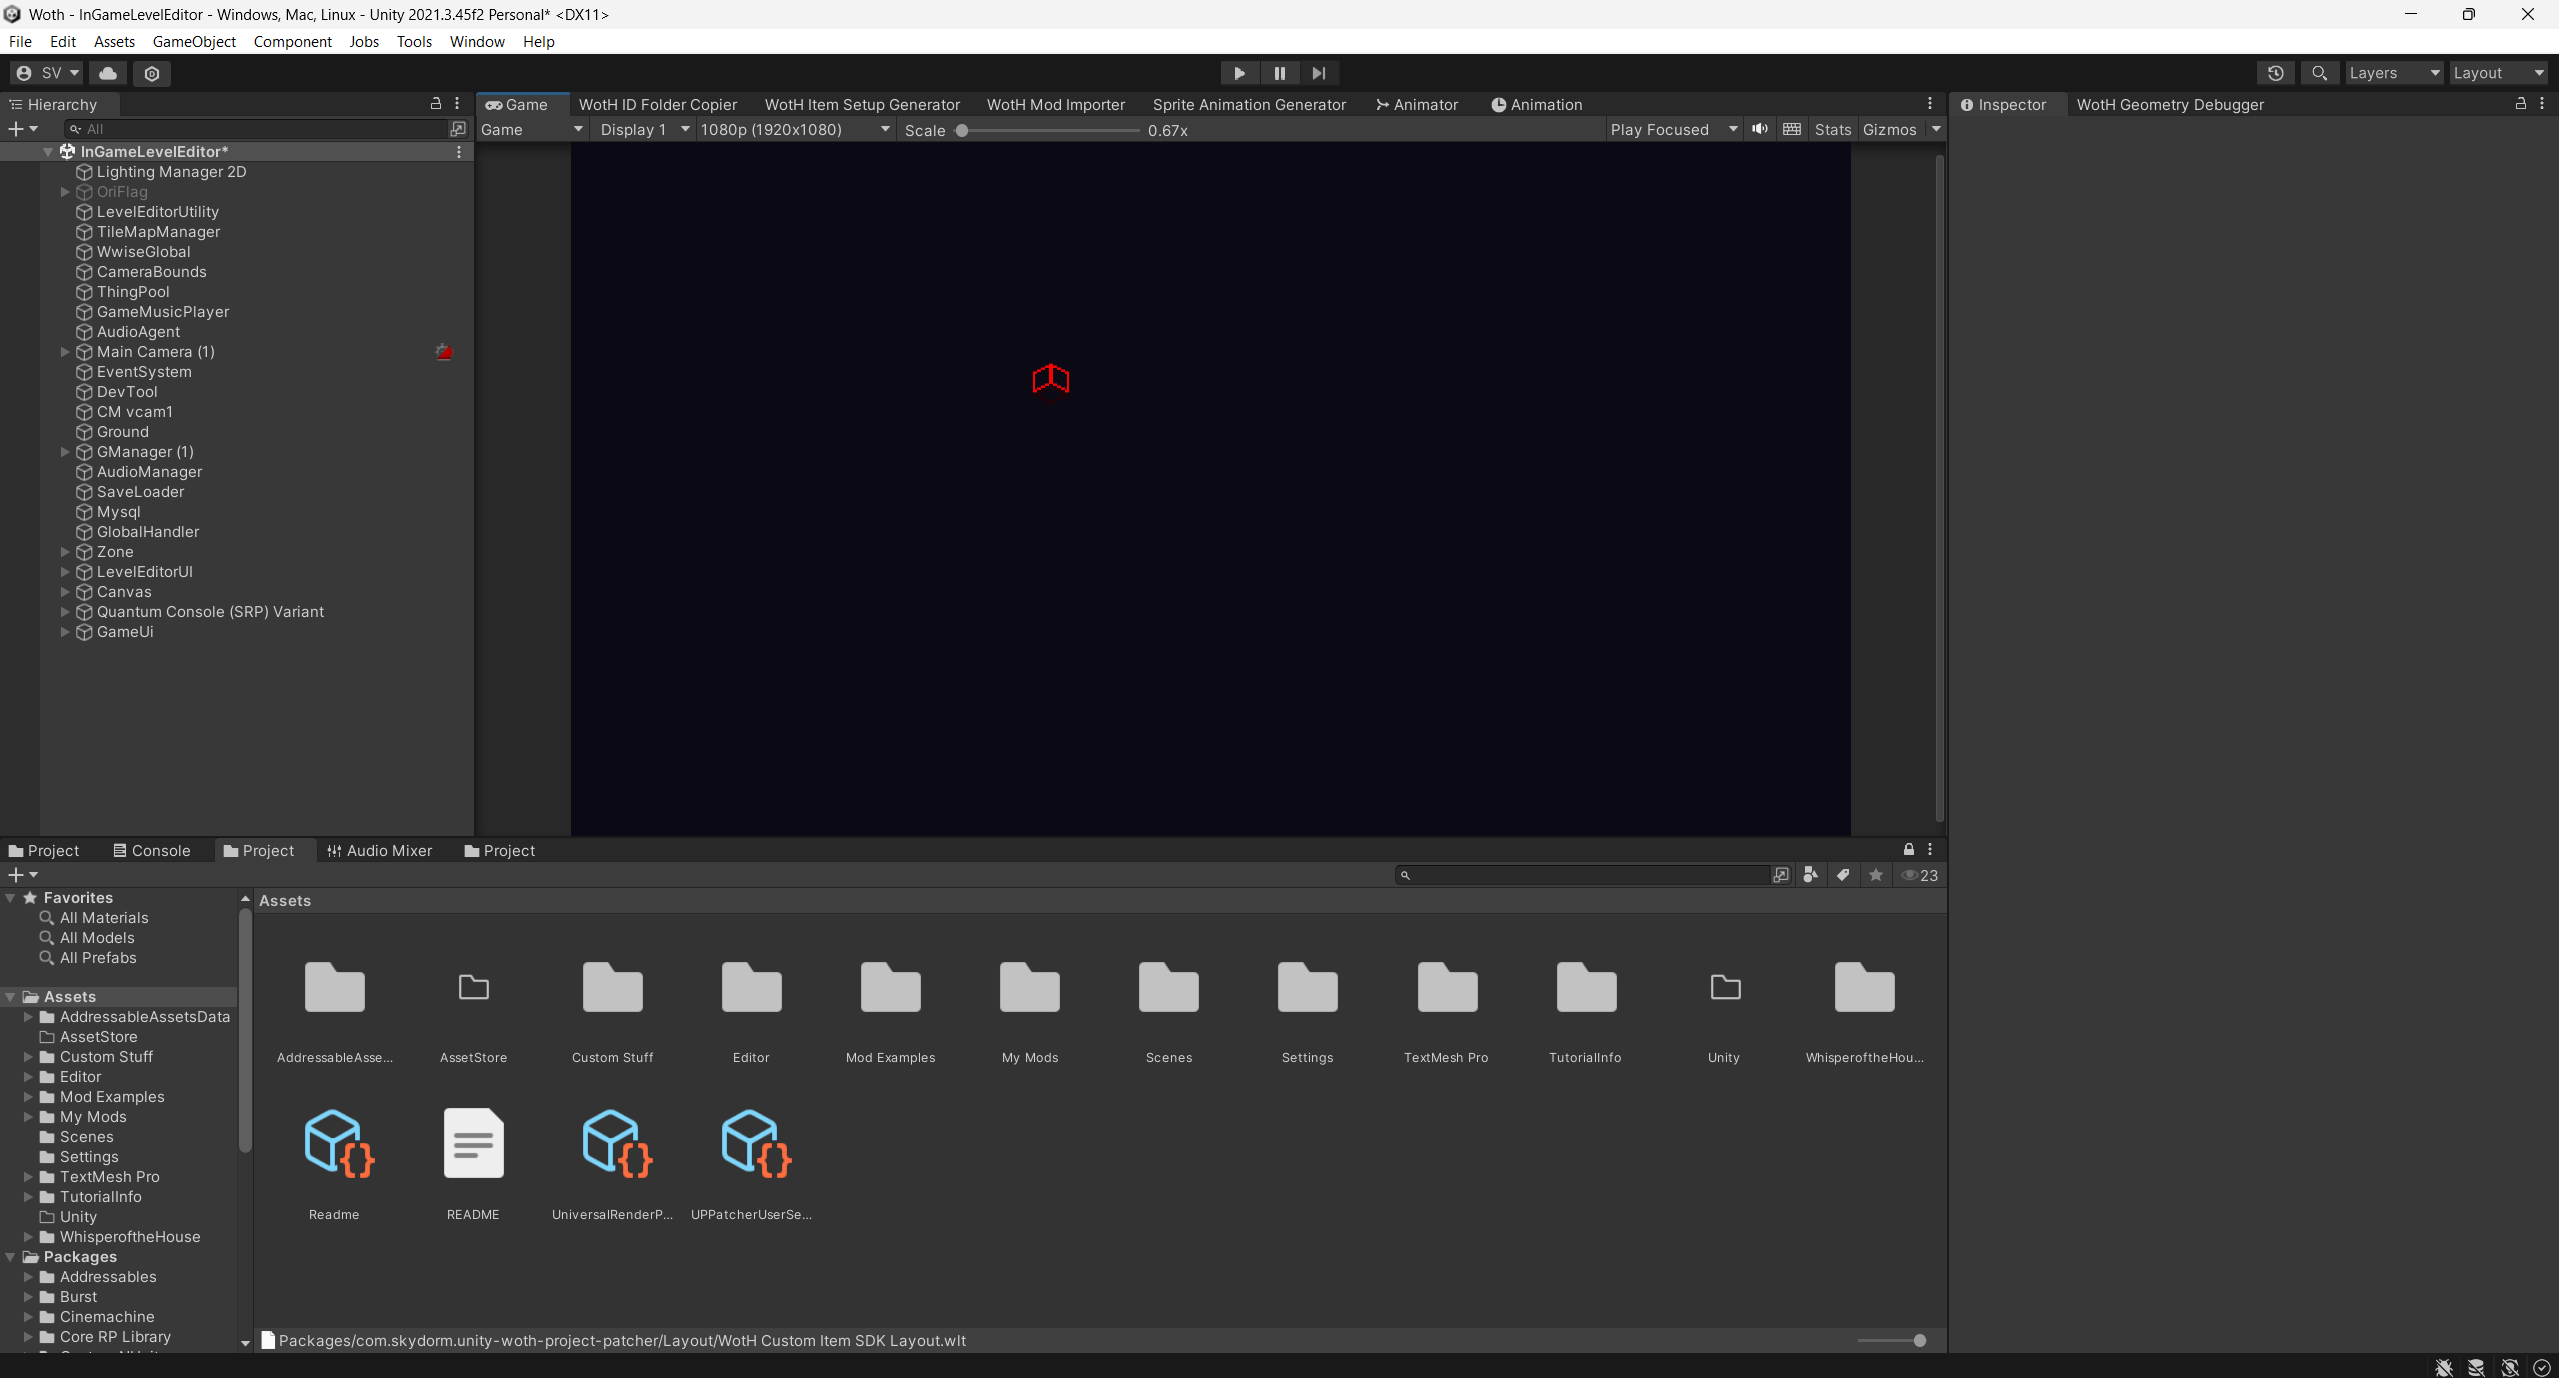
Unity reloads and shortly after your Project should look like this:
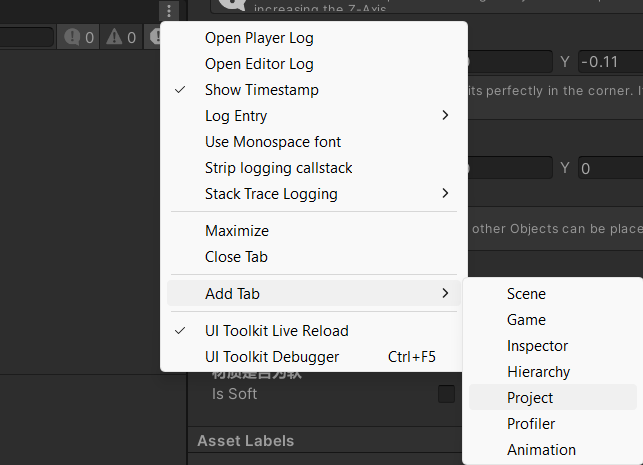
You might get an error because the first two Project Tabs don't show a valid path. Right click on them and remove the first two. To get them back, go to the right side and click on the three dots -> Add Tab -> Project.
Manual Setup
You can also setup the Layout of your Project yourself as well. First:
-
Go to the right side and right click on the Lighting Tab + Profiler Tab and remove them.
-
Delete the Scene Tab in the Middle, so that you only have the Game Tab open.
-
Move the Animation Tab to the Top
-
Add another Project Folder
-
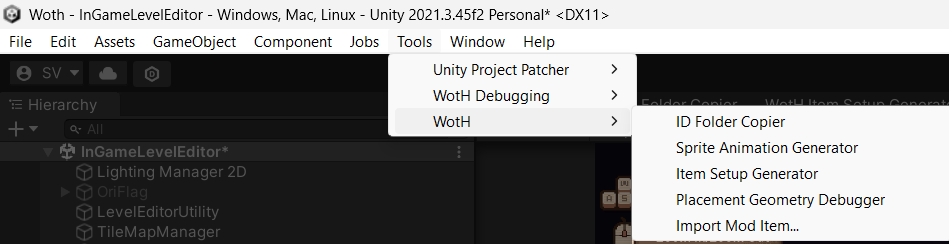
Open Tools -> WotH and open every Tab
-
Place the Tools on the Top screen in the following Order: WotH ID Folder Copier -> WotH Item Setup Generator -> WotH Mod Importer -> Sprite Animation Generator
-
The WotH Geometry Debugger can be placed on the right Tab next to Inspector.
This Step might be combined with the Repair Tool in the Future
Modding Recommendation
Keep your mods in the My Mods folder that comes with the wrapper.
If a mandatory game update breaks the generated project or your mods, this makes it easier to move your important files and patch the project again from the beginning.
This project generates a Unity project from your own copy of Whisper of the House.
Do not distribute the generated game files to other people.
Next Step
Your Unity project is now ready for mod development.
Continue with Tools to learn about the different tools used for creating custom items.